

Short answer: to change title block in Inventor for one drawing, edit the title block definition under Drawing Resources and insert it on the sheet. To change it across hundreds of existing drawings there is no native batch command — you either script it, or use an add-in that reads a source drawing and applies it to a folder.
This job usually arrives attached to something small and non-negotiable. The company moved office. The logo changed. Quality wants a revision field that isn’t there. A customer requires their part number in the corner.
Whatever triggered it, the shape of the problem is the same: the change itself takes four minutes, and then you remember there are 600 drawings.
First, understand what a title block actually is
This is worth thirty seconds because it explains why the batch problem exists at all.
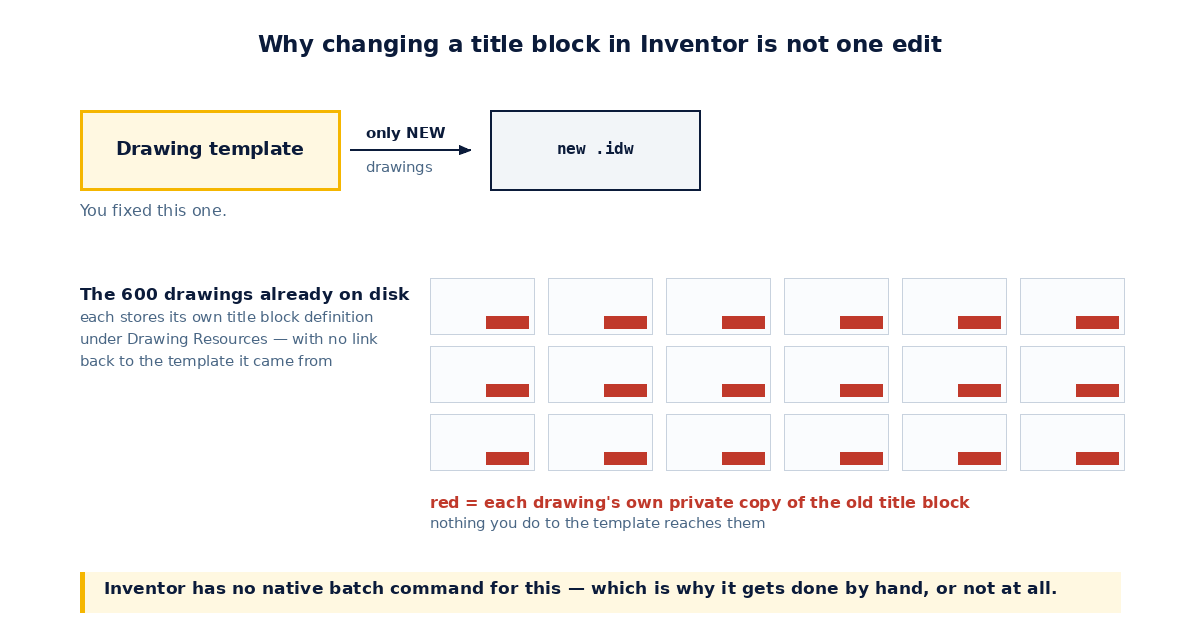
A title block is not a thing that lives centrally and gets referenced. It is a definition stored inside each drawing file, under Drawing Resources → Title Blocks, and each sheet displays an instance of it. There is no link back to the template the drawing was created from.
So updating your template is genuinely useful — and changes nothing about any drawing that already exists. Every one of those 600 files carries its own private copy.
1. Change title block in Inventor for a single drawing
In the browser, expand Drawing Resources → Title Blocks, right-click the format and choose Edit. You are now in a sketch: change geometry, text and property fields, then finish the edit and the sheets using that format update.
To build a new one from scratch, open an .idw and use Manage → Define → Title Block. Autodesk’s reference for the whole area is working with title blocks.
Use text fields that read iProperties, not typed text. A title block whose part number is a property field fills itself in on every drawing forever. One where somebody typed the number is a maintenance job disguised as a drawing.
The catch: this fixes exactly one file.
2. A handful of drawings: copy the definition between files
Open the drawing that has the correct title block alongside the one that needs it, and copy the title block from the Drawing Resources folder of the good drawing into the other. Then insert it on each sheet and delete the old instance.
Use it when: you have five or ten drawings and a spare twenty minutes.
The catch: it is per-sheet, per-drawing, and entirely manual. At thirty files people start making mistakes; at a hundred they start skipping files, which is worse — you end up with a project where some drawings carry the old address, and no record of which.
3. Fix the template so it stops recurring
Do this regardless of which route you take for the back catalogue, because it is the only thing that stops the problem coming back next year.
Update the title block in your drawing template, and make sure the template actually lives where the project points, not on one engineer’s desktop. Everything created from tomorrow is then correct by default.
The catch: still nothing for the existing files. Templates only apply at creation.
4. Hundreds of drawings: iLogic or the API
Inventor’s API can open a drawing, delete the existing title block instance, add the new definition and re-insert it. Wrap that in a loop over a folder and you have a batch tool.
Use it when: you have someone comfortable in iLogic or VB.NET and the change is a one-off big enough to justify writing it.
The catch: the happy path is easy and the edge cases are not. Drawings with several sheets. Sheets on different sizes needing different borders. Files checked into Vault. Read-only files. Drawings that fail to open at all. A batch script that silently skips the failures is more dangerous than doing nothing, because you will believe the job is done.
If you do write one, make it produce a report of what it touched and what it could not.
5. An add-in built for the batch case
This is the specific job the Title Block function of our Drawing Assistant add-in exists for. It reads the title blocks and borders from a source drawing you nominate, then applies them across many drawings — pointed at a folder and its subfolders, or at a list of files you supply.
The parts that matter in practice:
- It handles an unlimited number of title blocks and borders, so mixed sheet sizes are not a special case.
- It can run from a trigger — after a drawing is opened, or before it is saved — so drift gets corrected as people work rather than in one big migration.
- It carries a revision number showing the current revision of the latest update.
- It produces an error report for anything it could not process. This is the feature that matters most and the one home-made scripts usually lack.
You find it in a drawing under Manage → Define, next to the title block commands of Autodesk Inventor. Drawing Assistant runs on Autodesk Inventor 2020–2027.
Before you run anything across 600 files
Two rules, learned the way these usually are:
- Back up, or run it on a copied folder first. Any batch process that rewrites drawings deserves one rehearsal on data you can afford to lose.
- Check the report, not a sample. Opening five drawings and seeing the new title block proves five drawings. The files that failed are exactly the ones you will not think to open.
Every add-in has a 15-day free trial, which is enough to run it against a copy of a real project folder and read the report before committing. Browse the add-ins.